As I might have mentioned, in September of last year I took a withdrawal from my PHD studies in order to take on a lecturing role within the same department. For the last few months it’s been “Alex Gilbey MA, Lecturer In Fine Art”. Which is a little alarming.
It’s been rewarding, it’s been interesting, and I strongly suspect that the experience has taught me at least as much as I’ve managed to pass on to anyone else. But, again and again, when anyone’s asked me what it’s like, my standard response is that I chose a hell of a time to start teaching.
The pandemic has affected everyone, and given as I’m still employed and not on a ventilator I don’t feel I can complain too loudly. But it’s meant a very rapid change in the delivery of teaching, and for that matter of the whole approach to it. And one of the things I’ve been doing in the last few weeks, is demonstrating the principles of the camera obscura.
For me, that meant building one. It’s something I’ve wanted to do for a while and this seemed like a great excuse. In ideal times I’d build one in a fair sized room, and then troop the students into it for a demo. This wasn’t on the cards, for the dozen or so reason we’re all more than aware of. So, as with a few other practical techniques this semester, it was a case of making a video demonstration which the student body could then watch, followed by an online Q+A. I’ve found this to be the best alternative to face-to-face teaching and demonstration, even if it is a poor substitute for the real thing.
So then. Building a camera obscura.
Well the theory’s simple enough. Take a light proof structure (it can be a room, a tent, a cardboard box, whatever), and ensure that as little light as possible is entering. Then allow light to enter through one small hole. How small depends on what size box you’re working with. Through the miracle of optics, you’ll see an inverted picture of the outside world projected onto the wall opposite your opening. It’s what happens in a camera. For that matter, it’s what’s happening in your eyeball right now – the light from your screen is entering the light proof interior of your eye via hole provided by your pupil, and the inverted image is hitting your retina.
Sounds easy.
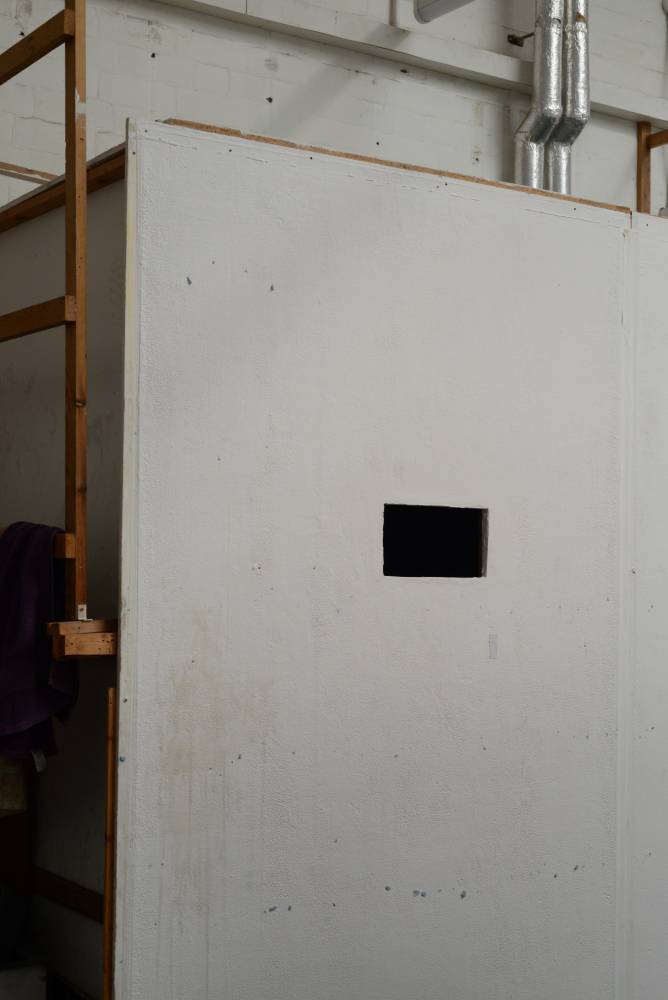
I started with a trial run in the school of art’s labyrinth – the plywood structure in the corner of one of our painting studios that we use for loading film into developing tanks. This seemed like a logical place to start, seeing as it was already a light proof box. There’s a speakeasy-style sliding hatch which allows the occupant to quickly turn the lights off and on, and with a sheet of plastic taped over it…

Here’s what the camera obscura was looking at:

And here’s the resulting image projected onto the back wall of the labyrinth – in the second image I’ve taped up some paper to give a better screen that was provided by the brickwork.
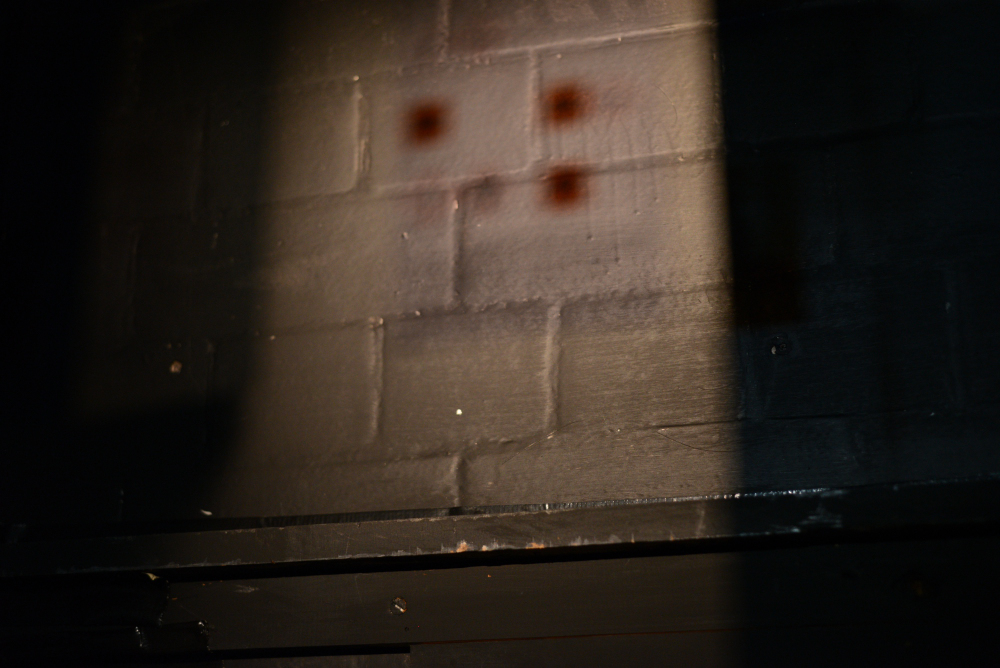

Well the principle worked. I will admit that the wall facing the hatch wasn’t the most exciting view in the world. And as we weren’t looking out into daylight I did have to give nature a helping hand in the lighting department. But I figured that for a first swing that wasn’t bad. What I needed was to do this on a larger scale, with a better view. And because this was going to be a demonstration for the students (and for anyone reading this if you’re interested) I wanted to do it with materials that are both cheap and easy to come by in the middle of a pandemic. That was also a good reason to build this on a larger scale – it makes the demonstration far easier to follow.
So, here’s the recipe for Uncle Alex’s Home Brew Camera Obscura.
Take a room. I’ve borrowed my colleague’s office, an old University halls of residence room that’s been turned over to the staff as office space.
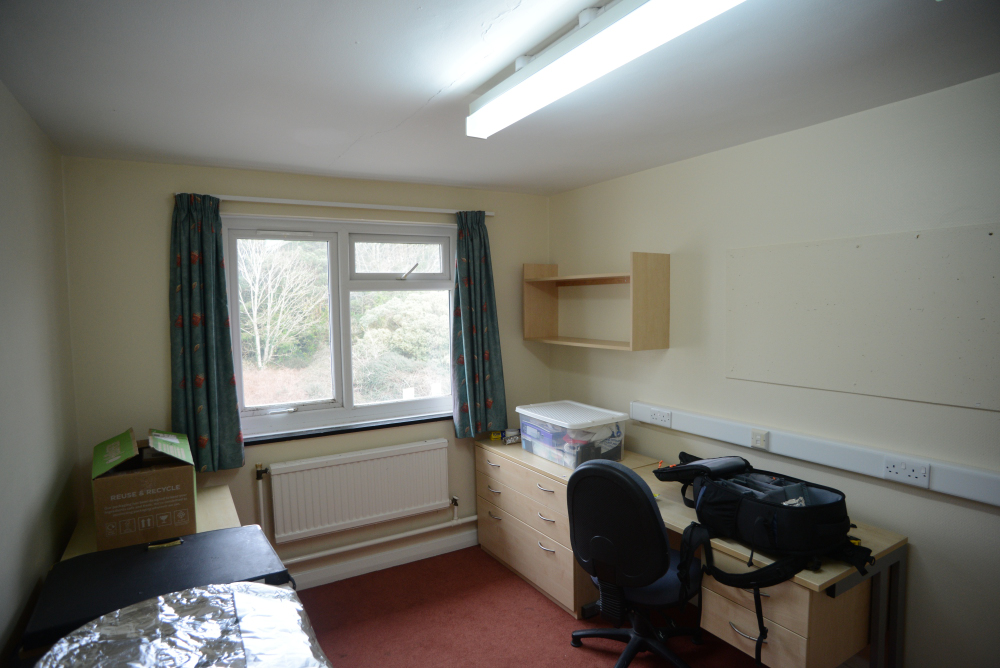
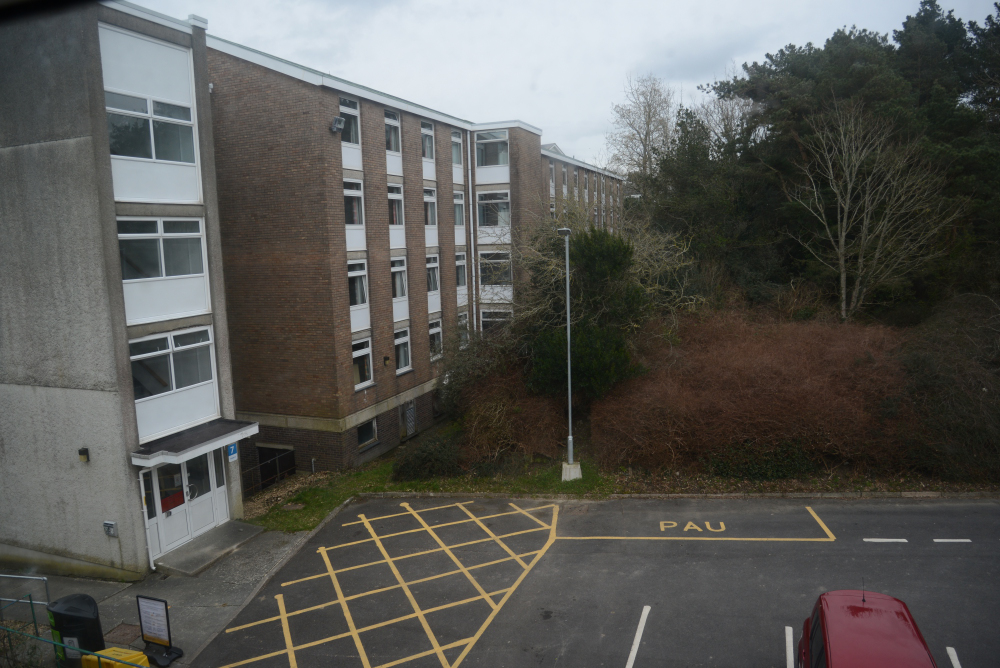
This also has the advantage of much better view than was possible indoors:

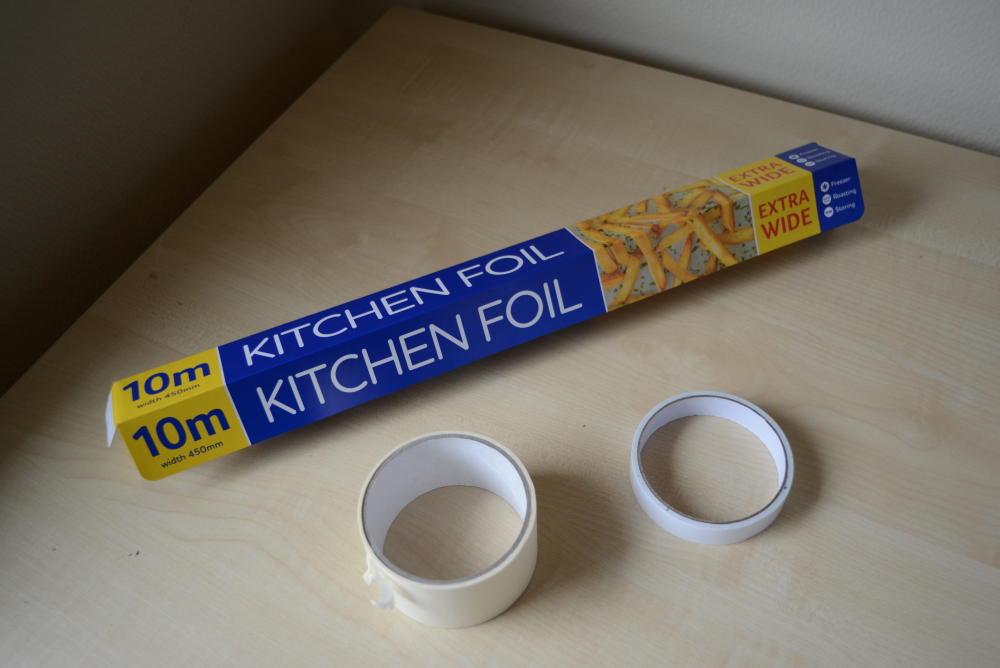
Construct your blackout curtain. I used baking foil – it’s lightproof and you can get it anywhere. I laid it out on the floor, with the pieces overlapping, and then joined it at the overlaps with double sided tape. If you want this to be in any way permanent then foil’s not the best idea. Every time it moves or flexes you get a slight tear in it, and by the time I’d taped it to the window then taken it down a few times it was less of a blackout and more of a starfield. But it worked. Some demonstrations I’ve seen recommend sealing the edges of the door – I didn’t, but then this door lead to a corridor with very few windows, so it wasn’t going to present too much of an issue. The foil, double sided tape and some masking tape to mount it into the window space came to three pounds for the lot. One piece of advice – make the curtain in one piece. My initial try involved blacking out the window one section at a time. The issue is that every join in the foil was another potential light leak. Tape the screen over your window. Secure the edges. You’ll know quickly if it’s worked, because you’ll have to turn on the lights to see what you’re doing.
With that in place, you need to make the hole which will admit just enough light. The question is, how large should it be? Start small – it’s far easier to make the hole larger than to try and make it smaller again. I’ve seen people recommend using washers mounted in cardboard frames for this job, and I can see that would work, but in the name of simplicity I just cut a hole in the foil. How big it needs to be depends on the size of the room, and there are equations to figure it out, but personally I started with the size you’d get from sticking a pencil all the way through the foil and went from there. Once you’ve made that hole, don’t adjust it immediately if you’re not seeing an image. Getting your eyes fully adjusted will take longer than you might think. Have a seat. Make yourself comfortable.

The moment when I saw it working was frankly pretty awesome. Despite knowing the theory and everything that went with it, there was a still a sense of childlike amazement when I started to see the projected images. No lens, no electronics, just light, optics and tinfoil. And I’ve worked with cameras of one kind or another since I was old enough to lift one, and like everyone I’ve seen photo-accurate images all of my life. What someone in Baghdad in 1000AD would have made of it I don’t know, but they most definitely saw it. It’s back then that Ibn al-Haytham was doing this, and a lot of other things. While people had discovered this effect at all parts of human history, al-Haytham’s book of optics really began to categorise this as a science. Along with maths, chemistry and metallurgy, optics was emerging in the Arab world at a time when my ancestors were sailing around in ships with dragons on the front.
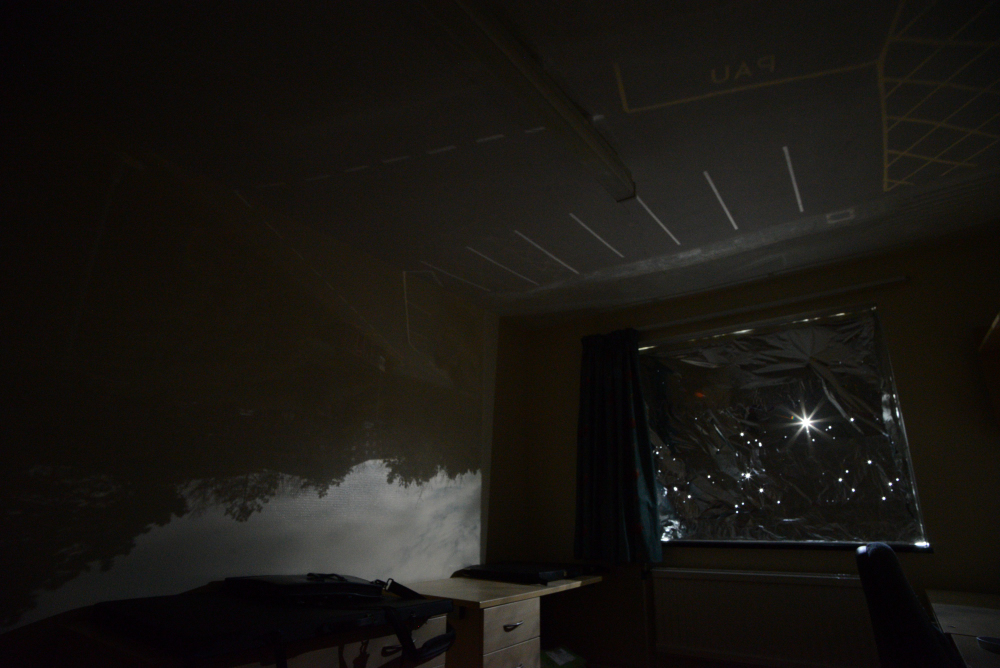
There it was, in all its inverted glory, projected onto the wall. I’d visit a few times while I had the thing up, to take the pictures that would form my how-to guide, and it never ceased to amaze. You could stare at the thing for a solid twenty minutes, and then just as you’re thinking of it as a still image someone would walk across the car park revealing that you were actually watching a live picture from the outside world.

And within a few minutes of one such viewing (actually my second viewing, after I’d performed a few running repairs to the foil…) I had to fight down the urge to pull out a sharpie and start drawing around the outlines of the projection – this would give me a photo-realistic drawing of the outside world. And if I came to that conclusion that fast, then it’s small wonder that artists down the centuries have come to the same conclusion. The art history side of all this is fascinating and much debated, and what it boils down to is that a lot of the artists you’d call “old masters” made great use of these techniques to create paintings with realistic perspective. Which is why it’s lecture one of an “Intro to Photography” course. There’s a few technical steps separating my camera obscura and the Nikon DSLR I used to capture the results, but I think you’ll agree that the progression is fairly evident. No camera obscura, no camera.
There you have it. It’s a camera, it’s an art project, it’s a physics experiment, it’s something to do on a rainy day. It’s an artists tool, a piece of history and a slice of the outside world dragged into a box for your examination.
And crucially, it’s a photography demonstration that can be completed in lockdown with materials from Poundland.
Writer’s note:
This project was completed in accordance with the COVID-19 legislation and guidance in place at that time. Work was completed at home where possible, and social distancing observed throughout.
